Some of the links in this post are affiliate links. This means we may earn a small commission if you make a purchase through these links—at no extra cost to you. We only recommend products and tools that we genuinely believe will help you with your dog.
Have you ever wondered why some dog trainers make training look so easy? They have happy dogs who seem excited to learn, tails wagging, eyes bright and focused. Meanwhile, you might be struggling with a dog who seems stressed, confused, or just not interested.
Here’s the secret: it’s not magic. It’s the right tools combined with the right approach.
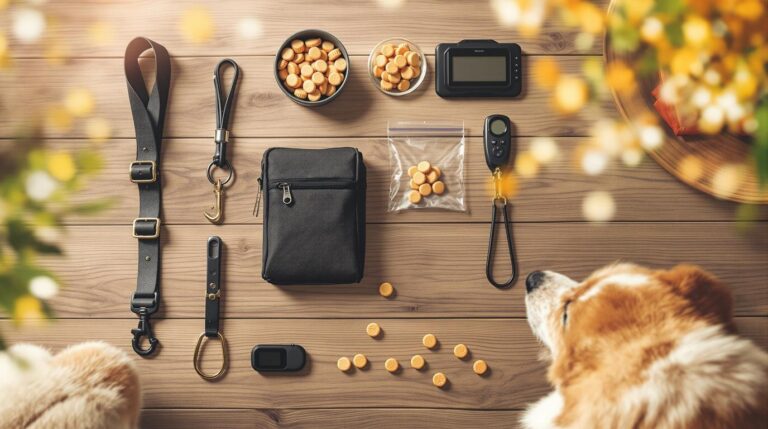
Positive reinforcement training uses rewards to teach dogs what we want them to do. And while the philosophy matters most, having the right tools makes everything easier, faster, and more fun for both you and your dog.
But here’s what nobody tells you: not all “positive” tools are created equal. Some work brilliantly. Some are a waste of money. And some that claim to be positive might actually be making things harder.
In this guide, we’ll walk through 15 essential positive reinforcement tools, explain the science behind why they work, help you build a toolkit that fits your budget, and show you how to use each tool effectively. Whether you’re brand new to dog training or you’ve been at it for years, you’ll find something helpful here.
Let’s dive in.
- Understanding Positive Reinforcement Tools
- The 3 Must-Have Tools (Every Dog Owner Needs These)
- The 7 Nice-to-Have Tools (Make Training Easier)
- The 5 Advanced/Specialty Tools
- Building Your Toolkit on a Budget
- How to Use Your Tools Effectively
- Tools to AVOID (And Why)
- Special Considerations
- When to Seek Professional Help
- FAQs About Positive Reinforcement Tools
- Conclusion: You’ve Got This
Understanding Positive Reinforcement Tools
Before we jump into the tools themselves, let’s get clear on what positive reinforcement actually means.
Positive reinforcement is a fancy term from behavioral science (called operant conditioning) that simply means: when your dog does something you like, you add something good to make that behavior happen more often.
Think of it like this: Your boss gives you a bonus when you complete a project early. You’re more likely to finish projects early in the future, right? Same concept with dogs. When your dog sits and you give him a treat, he’s more likely to sit next time you ask.
Why Tools Matter
Tools support this learning process in three main ways:
- Markers help you tell your dog exactly which behavior earned the reward
- Rewards motivate your dog to want to repeat the behavior
- Management tools keep your dog safe while learning and prevent mistakes
Important distinction: Tools are aids, not replacements for good training. A clicker won’t train your dog by itself. But you using a clicker to mark good behavior? That’s powerful.
Tools vs. Techniques
Here’s something that confuses a lot of people: a tool is just an object. What matters is how you use it.
A leash can be used positively (guiding your dog safely on a walk) or aversively (yanking and jerking). A crate can be a safe haven or a punishment. The tool itself is neutral. Your training philosophy determines whether it becomes positive or negative.
Why Positive Tools Work Better
Here’s the science: Studies show that dogs trained with positive reinforcement learn faster, retain behaviors longer, and have fewer behavior problems than dogs trained with aversive methods (punishment-based training).
Why? Because positive training:
- Builds confidence instead of fear
- Creates dogs who want to work with you
- Strengthens your bond
- Teaches dogs what TO do, not just what NOT to do
- Reduces stress and anxiety
Research published in the Journal of Veterinary Behavior found that dogs trained with aversive tools showed significantly more stress behaviors (yawning, lip licking, avoiding eye contact) than dogs trained with positive methods.
Bottom line: Positive tools work with your dog’s natural learning abilities, not against them.
The 3 Must-Have Tools (Every Dog Owner Needs These)
Let’s start with the absolute essentials. These three categories are non-negotiable if you want to train your dog effectively with positive reinforcement.
1. Markers (Telling Your Dog “Yes, That’s It!”)
What they are: Markers are signals that tell your dog, “That exact behavior you just did? That’s the one I want!”
Think of markers like a camera shutter. They capture the precise moment your dog does something right. Without a marker, your dog might not understand which behavior earned the treat.
Types of Markers:
Clickers – A small device that makes a distinct “click” sound
- Why they work: The sound is unique (your dog doesn’t hear it anywhere else), consistent (always sounds the same), and fast (marks behavior instantly)
- Best for: Precision training, teaching new behaviors, working at a distance
- Cost: $1.50-$8
Verbal markers – Words like “Yes!” or “Good!”
- Why they work: Convenient, always with you, hands-free
- Best for: Everyday life, when you don’t have a clicker handy
- Potential issue: Our tone changes with our mood; dogs notice
- Cost: Free
Visual markers – Thumbs up, a hand flash, or ASL sign
- Why they work: Perfect for deaf dogs or deaf trainers
- Best for: Deaf dogs, distance work, noisy environments
- Cost: Free
Tactile markers – A gentle touch or puff of air
- Why they work: For deaf-blind dogs
- Best for: Special needs dogs
- Cost: Free (or $2 for a straw for air puffs)
How to introduce a marker:
You need to “charge” the marker first. This means teaching your dog that marker = reward.
Simple process:
- Click (or say “yes”) → immediately give treat
- Repeat 20-30 times in short sessions
- Test it: Click when your dog isn’t looking at you. If he whips his head around expecting a treat, it’s charged!
Real-world example: Maya, a rescue Beagle, was terrified of training at first. Using a soft verbal marker (“yep!”) instead of a loud clicker helped her stay calm while learning. Within two weeks, she was offering sits and downs eagerly, tail wagging.
2. Rewards (What Your Dog Works For)
Here’s a truth many trainers won’t tell you: not all treats are created equal. And treats aren’t the only reward!
Understanding Reward Hierarchies
Dogs have preferences, just like we do. Think of rewards in three tiers:
High-value rewards (Your dog’s absolute favorites)
- Examples: Real chicken, cheese, hot dogs, freeze-dried liver, salmon
- When to use: Teaching something new, working in distracting environments, really tough challenges
- Think of these like your year-end bonus
Medium-value rewards (Pretty good, your dog will work for them)
- Examples: Commercial training treats, cut-up carrots with peanut butter, pieces of lunch meat
- When to use: Practicing known behaviors in moderate distractions
- Think of these like your regular commission or tips
Low-value rewards (Okay, but not exciting)
- Examples: Kibble, plain dog biscuits, tiny pieces of vegetables
- When to use: Behaviors your dog knows really well in familiar, calm environments
- Think of these like your hourly wage – you’ll work for it, but you won’t go above and beyond
Beyond Food: Other Rewards
Toys – For dogs who love play
- Ball-obsessed dogs: Use ball tosses as rewards
- Tug lovers: A quick game after a good behavior
- Real-world example: Cooper, an Australian Shepherd, would work harder for 10 seconds of tug than for any treat
Life rewards – Access to things your dog wants
- Opening the door for a walk (after a sit)
- Permission to sniff that interesting smell
- Getting to greet another dog (after polite behavior)
Attention and praise – For dogs who live for your approval
- Enthusiastic “Good dog!”
- Petting and scratching
- Eye contact and smiles
Pro tip: Mix it up! Sometimes give treats, sometimes toys, sometimes praise. This keeps your dog guessing and engaged.
How to Find Your Dog’s Preferences
Try the “buffet test”: Put several treats on the floor. Which one does your dog go to first? That’s high-value. Which one is left for last? That’s low-value.
Cost: $10-$30/month for treats, depending on training frequency and your dog’s size
3. Control Tools (Leashes, Collars, and Harnesses)
These tools keep your dog safe during training and help you manage their movement. But here’s what matters: which type you choose makes a huge difference.
Flat Collars
What they are: Basic buckle or snap collars made of nylon, cloth, or leather Best for: Holding ID tags, light control for trained dogs Not ideal for: Dogs who pull (can damage trachea) Cost: $10-$25
Harnesses: The Positive Trainer’s Best Friend
Front-clip harnesses – Leash attaches at the chest
- Why they work: When your dog pulls forward, the harness gently turns him back toward you. This isn’t punishment; it’s physics. The dog gets instant feedback: pulling = loss of forward motion. Walking nicely = forward movement continues.
- Best for: Dogs who pull, training loose-leash walking
- Popular brands: Freedom No-Pull Harness, PetSafe Easy Walk, 2Hounds Design
- Cost: $20-$50
Back-clip harnesses – Leash attaches at the shoulders
- Why they’re popular: Comfortable, no pressure on throat
- Caution: Can encourage pulling (that’s why sled dogs wear them!)
- Best for: Dogs who already walk nicely, small dogs, dogs with trachea issues
- Cost: $15-$40
Head Halters: Use with Caution
What they are: Similar to a horse halter; controls the dog’s head Controversial status: Many dogs find them aversive (they paw at them, rub their faces, act subdued) When they might help: Large, strong dogs where safety is critical during training Important: Requires careful conditioning and introduction My take: Try a front-clip harness first. If your dog genuinely accepts a head halter after proper conditioning, it can work. But if your dog hates it, listen to that feedback. Cost: $15-$30
Leashes
Standard 4-6 foot leash – Your everyday walking tool
- Material: Cotton, leather, or nylon (all work; choose what’s comfortable for you)
- Best for: Daily walks, training sessions
- Cost: $10-$25
Long lines (15-30 feet) – We’ll cover these in the next section!
What to AVOID:
❌ Prong/pinch collars – Metal prongs that dig into the neck ❌ Choke chains – Tighten and cut off air ❌ Shock/e-collars – Deliver electric shocks
Why avoid these? They work through pain and fear. Research shows they increase anxiety, aggression, and stress in dogs. There is no behavior that requires pain to teach.
Real-world example: Jake, a 90-pound German Shepherd, came to training pulling so hard his owner couldn’t walk him. Previous trainers recommended a prong collar. We switched to a front-clip harness and used high-value treats to reward loose-leash walking. Within three weeks, Jake walked calmly on a flat collar. No pain needed.
The 7 Nice-to-Have Tools (Make Training Easier)
These tools aren’t absolutely essential, but they make training significantly easier and more effective. If you’re serious about training, invest in these over time.
4. Treat Pouches
What it is: A small bag that clips to your belt or waist and holds treats
Why it helps: Trying to juggle a leash, clicker, and handful of cheese is hard. Your dog learns that when you reach into your pocket, a treat is coming—so he only performs when he sees you reaching. A treat pouch keeps rewards ready but out of sight.
Types:
- Simple belt pouches ($10-$15)
- Cross-body bags with multiple pockets ($20-$25)
- Magnetic closure pouches (easy one-hand access) ($15-$20)
Pro tip: Get one with a drawstring or magnetic closure so treats don’t fall out when you bend over!
Cost: $10-$25
5. Long Lines
What they are: Leashes 15-50 feet long that give your dog freedom while you maintain control
Why they’re valuable: Long lines are perfect for:
- Teaching reliable recall in open spaces
- Giving your dog exercise while training is in progress
- Practicing behaviors at a distance
Safety rules:
- Never let your dog hit the end of the line at full speed (can injure spine)
- Don’t use in crowded areas where other people/dogs could get tangled
- Keep hold of the handle—don’t drop it!
Materials:
- Cotton/nylon flat lines (less tangling, easier to clean)
- Thin cord lines (lightweight, but can cause rope burn if grabbed)
Real-world example: Bella, a Lab mix, had perfect recall in the house but terrible recall at the park. Using a 30-foot long line, we practiced recall with increasing distractions. After six weeks, her recall was solid even off-leash. The long line let her practice freedom safely while we built reliability.
Cost: $10-$30
6. Target Sticks
What they are: A stick (often telescoping or extendable) with a ball or target on the end
Why they’re useful: Target training teaches your dog to touch the target with his nose or paw. This is incredibly useful for:
- Teaching dogs to move to specific locations
- Building confidence in shy dogs
- Teaching complex tricks and movements
- Helping dogs learn precision behaviors
Types:
- Basic fixed-length sticks ($5-$8)
- Telescoping/retractable sticks ($10-$15)
- Clicker-stick combos (clicker built into the handle) ($12-$18)
DIY alternative: A wooden spoon works great!
Cost: $5-$15 (or free DIY)
7. Training Mats / Place Boards
What they are: A mat, rug, or raised platform that becomes your dog’s “place”
Why they help: Teaching “place” or “go to your mat” is one of the most useful behaviors you can train. It means:
- Your dog has a spot to relax when guests arrive
- You can take your dog to cafes and restaurants
- Your dog learns to settle on cue
Types:
- Towels (free, portable)
- Small washable rugs ($10-$20)
- Yoga mats ($15-$25)
- Raised platforms/cots for advanced training ($30-$60)
Key feature: Must be portable so you can practice in different locations
Real-world example: Sophie, a reactive terrier mix, learned that her mat meant “relax and watch the world.” We took her mat everywhere—the vet, outdoor cafes, friend’s houses. Within a month, stepping on her mat triggered instant calmness, even in exciting environments.
Cost: $0 (towel) to $40
8. Enrichment & Puzzle Toys
What they are: Toys that make your dog work for food or engage their brain
Why they matter: Mental exercise is training, too. A tired brain = better behavior. Enrichment tools:
- Reduce boredom (which causes destruction)
- Build problem-solving skills
- Provide appropriate outlets for natural behaviors (sniffing, chewing, hunting)
Types:
Kongs and stuffable toys ($5-$15)
- Fill with peanut butter, kibble, wet food
- Freeze for longer-lasting challenge
Snuffle mats ($15-$30)
- Mimic foraging; hide treats in fabric strips
- Great for fast eaters
Puzzle feeders ($10-$40)
- Sliding pieces, flip doors, rotating levels
- Start easy and increase difficulty
DIY options:
- Muffin tin with tennis balls over treats
- Cardboard boxes stuffed with paper and treats
- Treats hidden in rolled-up towels
Pro tip: Rotate toys! Don’t give your dog access to everything at once. Keep things novel and exciting.
Cost: $5-$40 per toy
9. Crates and Gates
What they are: Management tools that create safe spaces and prevent mistakes
Why they’re training tools: Here’s the thing about training—prevention is huge. If your puppy never gets the chance to chew your couch (because he’s safely crated), he never learns that couch-chewing is fun.
Crates:
- Safe space for your dog (like a den)
- Essential for house training
- Prevents destructive behavior when you can’t supervise
- Never use as punishment
Gates:
- Block off areas of the house
- Separate dogs who need space
- Create training zones
Important: Crates must be introduced positively. Feed meals in the crate, toss treats inside, never force your dog in.
Cost: $30-$150 for crates; $25-$60 for gates
10. Muzzles (Yes, They’re Positive Tools!)
Wait, muzzles? Yes! Here’s why they belong in a positive training toolkit:
Basket muzzles allow dogs to pant, drink, and take treats while preventing bites. They’re essential for:
- Fearful or reactive dogs during training
- Emergency vet visits
- Grooming appointments for anxious dogs
- Safety while working on behavior modification
Key point: Muzzles are SAFETY tools, not punishment. A properly conditioned muzzle can save your dog’s life (if he bites someone, he could be labeled dangerous).
How to condition positively:
- Let dog sniff muzzle → treat
- Hold muzzle, dog puts nose in → treat
- Gradually increase duration
- Add strap, very briefly → treat
- Slowly build up wearing time
A properly trained dog will happily put his face in the muzzle because it predicts good things!
Cost: $15-$50
The 5 Advanced/Specialty Tools
Once you’ve mastered the basics, these tools can take your training to the next level or address specific needs.
11. Flirt Poles
Like a giant cat toy for dogs. A pole with a rope and lure that lets you exercise and train your dog’s impulse control.
Great for: High-energy dogs, building “wait” and “take it” cues Cost: $15-$30
12. Clicker-Leash Combos
Leashes with built-in clickers for convenience during walks.
Great for: Training on the go Cost: $12-$20
13. Vibration Collars (NOT Shock Collars)
For deaf dogs, vibration collars can serve as a marker or attention-getter (like tapping a deaf person’s shoulder).
Important: These are VIBRATION only, never shock Great for: Deaf dogs Cost: $30-$60
14. Scent Work Kits
Containers, scented oils, and training guides for teaching your dog nose work.
Great for: Mental enrichment, building confidence, tapping into natural abilities Cost: $20-$50
15. Agility Equipment
Jumps, tunnels, weave poles for advanced training fun.
Great for: Bonding, exercise, confidence building DIY options: Broomstick jumps, cardboard tunnels Cost: $50-$300+ (or free DIY)
Building Your Toolkit on a Budget
Let’s be real: That’s a lot of tools. And maybe you’re thinking, “I can’t afford all this!”
Good news: You don’t need everything at once.
The $25-$75 Starter Kit:
Absolute essentials:
- Clicker: $2-$5
- Treat pouch: $10-$15
- High-value treats: $10-$15
- Front-clip harness: $20-$30
- Standard leash (if you don’t have one): $10-$15
Total: $52-$80
That’s it. That’s all you need to get started.
Add Over Time:
- Month 2: Long line ($15-$25)
- Month 3: Puzzle toy/Kong ($10-$15)
- Month 4: Training mat ($0-$20, towel works!)
- As needed: Crate, gate, or other specialty tools
DIY Alternatives:
- Target stick: Wooden spoon
- Training mat: Old towel
- Treat pouch: Ziplock bag in your pocket (not ideal but works short-term)
- Puzzle toys: Muffin tin with tennis balls
- Agility jumps: Broomstick across two chairs
Where to find deals:
- Buy Nothing groups on Facebook
- Craigslist/OfferUp
- Pet supply swap meets
- End-of-season sales at pet stores
How to Use Your Tools Effectively
Having the tools is only half the battle. Here’s how to make them work.
The Importance of Timing
Good training happens in seconds. Mark the behavior within 0.5-1 second of it happening, then deliver the reward within 1-2 seconds of the mark.
Bad timing: Dog sits → you fumble with treats for 5 seconds → finally give treat. Dog now thinks he got rewarded for standing up again (which he did by the time you delivered the treat).
Good timing: Dog sits → immediate click → treat within 1 second. Crystal clear communication.
Consistency Across Family Members
Everyone in your household must use tools the same way. If you click for “sit” but your partner clicks for “sort of sitting,” your dog gets confused.
Family meeting checklist:
- What markers are we using?
- What commands/cues?
- What behaviors are we reinforcing?
- Who’s in charge of training sessions?
Pairing Tools with Techniques
Tools don’t train by themselves. You need:
- Luring: Using a treat to guide your dog into position
- Capturing: Marking and rewarding behaviors your dog offers naturally
- Shaping: Rewarding small steps toward the final behavior
Example: Teaching “down”
- Lure with treat toward ground (technique)
- Click when elbows touch ground (tool: marker)
- Deliver high-value treat (tool: reward)
Common Mistakes and How to Avoid Them
❌ Clicking too late → Practice without your dog first ❌ Treating before clicking → Always mark THEN reward ❌ Using low-value treats in high-distraction environments → Match treat value to difficulty ❌ Overusing treats as bribes → Dog should earn treats for behaviors, not just for existing ❌ Relying only on tools → Build relationship and communication, too
When Tools Alone Aren’t Enough
If you have the right tools but training still isn’t working, the issue might be:
- Behavior problem needs professional help (aggression, severe anxiety)
- You need better technique (timing, rate of reinforcement)
- Medical issue affecting behavior (pain, hearing loss)
- Environmental stressors (too distracting, dog is scared)
Tools to AVOID (And Why)
Let’s talk about what NOT to buy, even if someone recommends it.
Prong/Pinch Collars
What they are: Metal collars with prongs that poke into the dog’s neck when pulled
Why to avoid: They work through pain and intimidation. Even when used “correctly,” they suppress behavior through discomfort rather than teaching your dog what TO do.
Research says: Studies show prong collars increase stress, fear, and aggression.
Choke Chains
What they are: Metal chains that tighten around the neck
Why to avoid: Can cause tracheal damage, neck injuries, and increased reactivity. They work by choking your dog. That’s literally the mechanism.
Shock/E-Collars
What they are: Collars that deliver electric shocks
Why to avoid: Even on the lowest setting, they cause pain. Research shows they increase anxiety and fear-based behaviors. Many countries have banned them entirely.
But what about “modern” e-collars? Still aversive. There is no behavior that requires pain to teach.
Spray Bottles and Air Horns (As Punishers)
What they are: Water sprays or loud noises used to stop behaviors
Why to avoid: They work through fear and startle. They don’t teach alternative behaviors. And they often backfire—your dog may become afraid of YOU or develop anxiety around whatever was happening when you sprayed/honked.
The Science Against Aversive Tools
Study after study confirms:
- Dogs trained with positive methods learn faster
- They show less stress
- They have better relationships with their owners
- They’re less likely to develop aggression
A 2021 study in PLOS ONE found that dogs trained with aversive tools displayed significantly more stress-related behaviors both during and after training sessions compared to dogs trained with rewards.
Bottom line: Positive tools work better, faster, and kinder. There’s no reason to use pain-based tools.
Special Considerations
Tools for Deaf Dogs
- Visual markers: Thumbs up, hand flash, flashlight
- Vibration collars: For getting attention (never shock)
- All the same positive tools – just adapted for vision instead of sound
Tools for Blind Dogs
- Verbal and tactile markers work beautifully
- Scent markers can help mark locations
- Sound-making toys for enrichment
Multi-Dog Households
Challenges:
- Dogs competing for rewards
- Different skill levels
- Individual tool preferences
Solutions:
- Train separately initially
- Use management tools (gates) to prevent conflicts
- Reward each dog individually
- Eventually train together for group behaviors
Breed-Specific Considerations
Herding breeds (Border Collies, Aussies): Love target sticks and agility tools Scent hounds (Beagles, Bloodhounds): HIGHLY food motivated; scent work is ideal Terriers: Short, high-energy sessions; flirt poles are perfect Giant breeds (Mastiffs, Great Danes): Need comfortable harnesses and durable, large treats
Age-Appropriate Tools
Puppies (8 weeks-6 months):
- Soft treats (small pieces)
- Lightweight leashes/harnesses
- Crates for house training
- Simple puzzle toys
Adults (1-7 years):
- Full range of tools
- More challenging enrichment
- Advanced training equipment if desired
Seniors (7+ years):
- Softer treats (dental health)
- Supportive harnesses (arthritis-friendly)
- Lower-impact enrichment (scent work over agility)
Anxious or Fearful Dogs
Go slow: Introduce all tools gradually High-value rewards: Especially important Calming tools: Mats become especially valuable Professional help: Often needed; don’t hesitate
When to Seek Professional Help
You should consult a professional positive reinforcement trainer if:
- You’ve had the tools and tried for 4-6 weeks with no progress
- Your dog shows aggression (growling, lunging, biting)
- Your dog is extremely fearful or anxious
- You’re not sure how to use the tools effectively
- Your dog has a specific behavioral issue (separation anxiety, reactivity)
Finding a Qualified Trainer
Look for certifications:
- CPDT-KA (Certified Professional Dog Trainer – Knowledge Assessed)
- CBCC-KA (Certified Behavior Consultant Canine – Knowledge Assessed)
- KPA CTP (Karen Pryor Academy Certified Training Partner)
Red flags to avoid:
- Trainers who use shock, prong, or choke collars
- Trainers who talk about “dominance” or “alpha”
- Trainers who won’t let you observe a class first
- Trainers who guarantee results (ethical trainers don’t do this)
FAQs About Positive Reinforcement Tools
1. Do I really need all these tools?
No! Start with the three essentials (marker, rewards, control tool). Add others as you progress and identify specific needs.
2. Can I use food rewards forever?
You can, but you’ll naturally phase them out for many behaviors. For new or difficult behaviors, always use rewards. For well-established behaviors in easy environments, you can maintain them with intermittent rewards (sometimes yes, sometimes no—this actually makes behaviors stronger!).
3. What if my dog isn’t food motivated?
First, make sure your dog is actually hungry (don’t train right after meals). Then try higher-value treats. If food truly doesn’t work, find what does: toys, play, access to sniffing, attention. Every dog is motivated by something.
4. How long before I can phase out tools?
Depends on the tool. Markers can often become intermittent after 6-12 months of solid training. Leashes and harnesses remain management tools for life. Enrichment toys? Keep using them forever—mental stimulation is always valuable!
5. Are clickers better than verbal markers?
Clickers are more precise because the sound is always identical. Verbal markers can vary with your tone and mood. That said, verbal markers are more convenient. Many trainers use both: clicker for teaching new behaviors, verbal marker for maintaining known behaviors in daily life.
6. What’s the difference between a front-clip and back-clip harness?
Front-clip harnesses discourage pulling because when the dog pulls, the harness turns him back toward you. Back-clip harnesses don’t discourage pulling (think sled dogs). For most pet dogs learning loose-leash walking, front-clip is better.
7. Can positive tools work for aggressive dogs?
Yes! Positive reinforcement is especially important for aggressive dogs because punishment can make aggression worse. That said, aggression should always be addressed with a professional trainer or veterinary behaviorist. Tools like muzzles become essential for safety during training.
8. How do I store and organize all these tools?
Get a dedicated training bag or bin. Keep:
- Treat pouch (loaded and ready)
- Clicker attached to treat pouch
- Leashes/harnesses on hooks by the door
- Enrichment toys in rotation (not all out at once)
- Long lines in garage/shed
Having everything organized means you’re more likely to train consistently!
Conclusion: You’ve Got This
Here’s what I want you to remember: You don’t need to be perfect. You don’t need every tool on this list. You just need to start.
Positive reinforcement training is about building a partnership with your dog based on trust, communication, and mutual respect. The tools we’ve covered simply make that partnership easier to build.
Start here:
- Get a clicker (or choose a verbal marker)
- Find high-value treats your dog loves
- Invest in a good front-clip harness
- Practice marking and rewarding behaviors you like
That’s it. That’s your starting point.
As you progress, add tools that solve specific challenges. Need to work on recall? Add a long line. Want to tire out your high-energy dog? Add enrichment toys. Training a deaf dog? Add visual markers.
The most important “tool” is your commitment to training with kindness, patience, and consistency. Everything else just supports that goal.
Your dog doesn’t need fancy equipment. He needs you—paying attention, celebrating his wins, guiding him through challenges, and building a relationship based on trust, not fear.
You can do this. Your dog believes in you. Now grab a clicker and some treats, and let’s get started.