
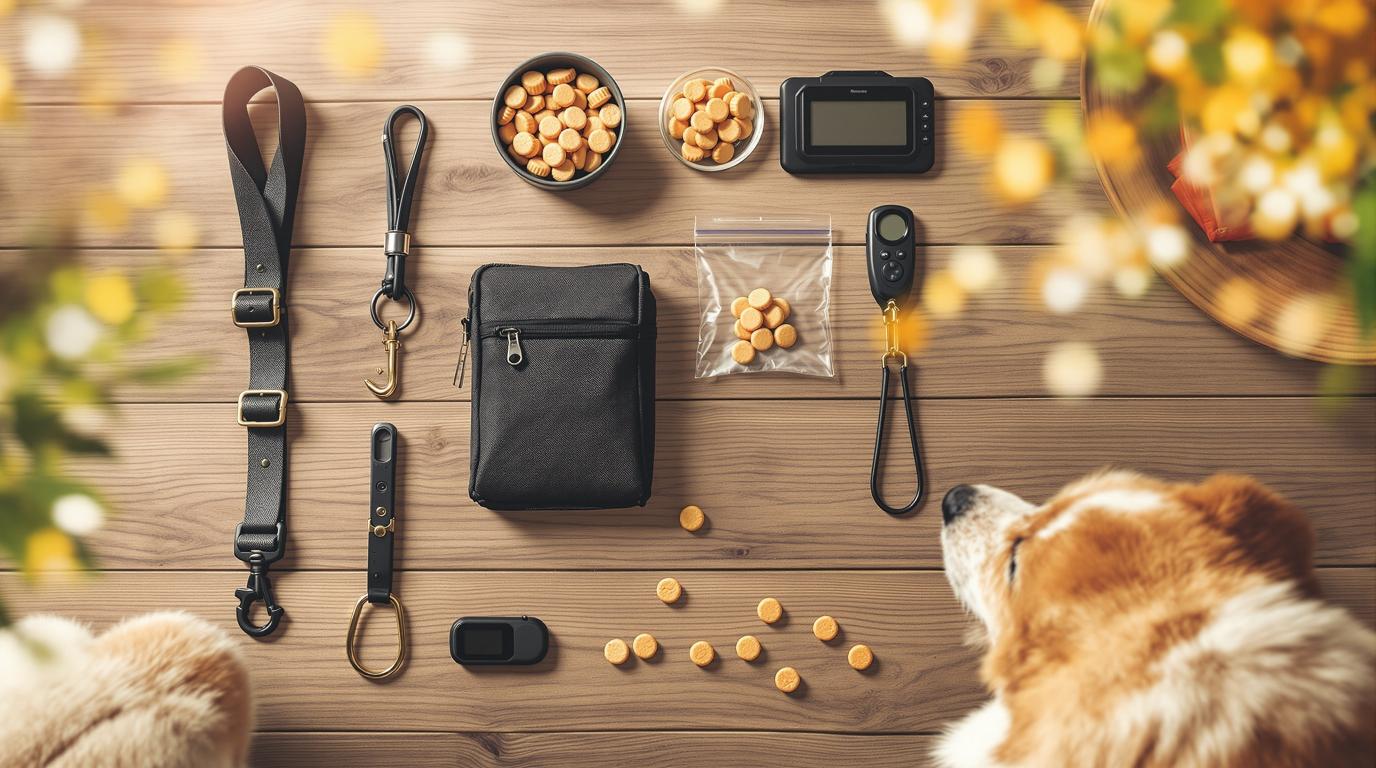
Some of the links in this post are affiliate links. This means we may earn a small commission if you make a purchase through these links—at no extra cost to you. We only recommend products and tools that we genuinely believe will help you with your dog.
Have you ever walked into a pet store to buy training supplies and felt completely overwhelmed? The walls are lined with hundreds of leashes, collars, toys, and gadgets—all promising to transform your dog into the perfect companion. Your head spins. Your wallet feels lighter just looking at the prices. And you think: “Do I really need all this stuff?”
Here’s the truth: No, you don’t.
Most dog owners waste money on tools they never use or don’t know how to use properly. I’ve been there. My first trip to the pet store resulted in three different leashes, two harnesses I couldn’t figure out how to put on, and a clicker that sat in a drawer for six months.
The good news? You only need a handful of essential tools to train your dog successfully. The key is knowing which ones actually help, how to use them properly, and when to add more as your training progresses.
In this guide, I’ll walk you through exactly what to buy (and what to skip), how much it really costs, and how each tool helps your training goals. Whether you’re bringing home your first puppy or finally tackling that pulling problem with your adult dog, you’ll know exactly where to start—without breaking the bank.
Ready to build your perfect training toolkit? Let’s dive in!
- 1. Understanding Training Tools (Before You Buy Anything)
- 2. The Essential Starter Kit (Must-Haves for Every Dog)
- 3. Important Add-Ons (Your Next Priority)
- 4. Training Goal-Specific Tools
- 5. Advanced/Optional Tools (When You’re Ready)
- 6. Size and Age Considerations
- 7. Common Mistakes (And How to Avoid Them)
- 8. Caring for and Organizing Your Tools
- 9. Budget-Friendly Alternatives
- 10. When to Seek Professional Help
- Conclusion: Your Shopping List and Action Plan
1. Understanding Training Tools (Before You Buy Anything)
Why Tools Matter (But Aren’t Magic)
Let’s get something straight right away: training tools don’t train your dog—you do. A fancy harness won’t magically stop pulling. An expensive clicker won’t teach “sit” on its own. These tools are aids that help you communicate more clearly with your dog.
Think of it like learning to cook. You need a good knife, a cutting board, and a pan. But having expensive equipment doesn’t make you a chef. The skill comes from practice, consistency, and understanding how to use each tool properly.
The same goes for dog training. Tools help you:
- Communicate more clearly (markers like clickers)
- Keep your dog safe (leashes, harnesses)
- Motivate learning (treats, toys)
- Manage environments (crates, gates)
- Practice skills safely (long lines for recall)
But they only work when paired with patience, consistency, and time.
How to Choose the Right Tools for YOUR Dog
Not every dog needs the same equipment. What works for a 10-pound Yorkie won’t work for a 90-pound German Shepherd. Here’s what to consider:
Your Dog’s Size:
- Toy breeds (under 10 lbs): Extra-small harnesses, lightweight leashes
- Small dogs (10-25 lbs): Small collars, standard leashes
- Medium dogs (25-60 lbs): Most standard equipment fits
- Large dogs (60-100 lbs): Heavy-duty everything
- Giant breeds (100+ lbs): Reinforced gear, wider collars
Your Dog’s Age:
- Puppies: Adjustable gear (they grow fast!), soft treats
- Adults: Standard equipment, focus on training goals
- Seniors: Padded harnesses, joint-friendly tools
Your Dog’s Temperament:
- Calm: Standard tools work great
- Energetic: Extra exercise before training, puzzle toys
- Anxious: Gentle tools, gradual introductions
- Strong-willed: High-value rewards, patience
Your Training Goals:
- Basic obedience? Start simple
- Loose-leash walking? Front-clip harness
- Recall training? Long line essential
- Behavior problems? May need professional help
Match the tool to your situation, not the other way around.
Budget Reality Check: What Does This Actually Cost?
Let’s talk money. Training doesn’t have to be expensive, but you do need to invest in quality basics.
Starter Kit (Week 1): $70-165
- These are absolute must-haves to begin training
Important Add-Ons (Weeks 2-4): $70-240
- Tools that make training easier and more effective
Advanced/Optional (Month 2+): $50-300+
- For specific goals or as skills progress
Total investment for comprehensive training setup: $190-705
Can you spend less? Yes! I’ll share budget-friendly alternatives throughout this guide. Should you cheap out on everything? No—some tools are safety-critical and worth the investment.
The key is starting with essentials, then adding tools as you discover what your specific dog needs.
2. The Essential Starter Kit (Must-Haves for Every Dog)
Tool 1: Collar with ID Tag
What It Is: A collar is a band that goes around your dog’s neck. The three most common types are:
- Flat collar: Standard buckle or quick-release
- Martingale collar: Tightens slightly to prevent escape (doesn’t choke)
- Breakaway collar: Releases if caught on something (safety feature)
Why You Need It: Beyond training, this is a safety essential and legal requirement in most places. If your dog gets loose, an ID tag is the fastest way someone can reach you. Even if your dog is microchipped, a visible tag means instant contact—no trip to the vet or shelter required.
How to Choose:
- Width matters: Small dogs need 1/2″ collars; medium dogs need 3/4″-1″; large dogs need 1″-1.5″; giant breeds need 1.5″-2″
- Measure the neck: Add 2 inches to your dog’s neck measurement
- Two-finger rule: You should fit two fingers under the collar comfortably
Cost: $10-30
Pro Tip: Get your dog’s name and your phone number engraved on the tag. Skip the address for privacy—a phone number is all someone needs to reunite you with your lost dog.
Tool 2: Standard Leash (4-6 Feet)
What It Is: Your everyday walking leash. The standard length is 6 feet, though 4-foot leashes offer more control for training.
Why You Need It: A leash is your primary communication and safety tool. It keeps your dog close during training, prevents them from running into danger, and gives you control in public spaces.
How to Choose:
- Length: 6 feet for general walking, 4 feet for tight control during training
- Material options:
- Nylon: Affordable, lightweight, comes in fun colors
- Leather: Durable, softens over time, more expensive
- Biothane: Waterproof, easy to clean, great for rainy climates
- Handle comfort: Look for padded handles if you have a strong dog
- Clip strength: Metal clips are more durable than plastic
Cost: $15-40
What NOT to Buy: ❌ Retractable leashes for training. Here’s why:
- They teach your dog that pulling = more freedom
- You have less control if something unexpected happens
- The thin cord can cause injuries to both you and your dog
- They’re bulky and awkward for teaching loose-leash walking
Save retractable leashes for after your dog has mastered walking skills.
Pro Tip: Leashes with two handles (one at the end, one near the clip) are incredibly useful. The second handle gives you instant close control in busy situations—no need to reel in the leash hand-over-hand.
Tool 3: Harness OR Proper Training Collar
What It Is: You need something that connects your leash to your dog. The choice between harness and collar depends on your dog and your training goals.
When to Use a Harness: Harnesses are better than collars for:
- Dogs who pull (front-clip harnesses discourage pulling)
- Small breeds (less pressure on delicate tracheas)
- Brachycephalic breeds (Pugs, Bulldogs—already have breathing challenges)
- Puppies (still learning, necks are sensitive)
Harness Types:
- Back-clip harness: Clips on the back between shoulder blades
- Good for: Dogs who already walk well
- Not ideal for: Pullers (gives them more leverage)
- Front-clip harness: Clips on the chest
- Good for: Strong pullers (redirects them sideways)
- Best for: Training loose-leash walking
- Example: 2 Hounds Freedom Harness
- Dual-clip harness: Clips on both back and front
- Good for: Versatility—use front clip for training, back clip for relaxed walks
- Most flexible option
When to Use a Collar: Standard flat collars work for dogs who:
- Walk calmly without pulling
- Have completed basic leash training
- Don’t have breathing issues
Martingale collars are excellent for:
- Dogs who can slip out of regular collars
- Narrow-headed breeds (Greyhounds, Whippets)
- Gentle control without choking
Cost: $20-50 for quality harness or collar
What to AVOID: ❌ Prong/pinch collars – Metal prongs dig into the neck ❌ Choke chains – Can damage the trachea and cause pain ❌ Shock/e-collars – Cause fear, anxiety, and can lead to aggression
Why these tools harm:
- They work through pain and fear, not learning
- They damage trust between you and your dog
- Research shows they increase anxiety and aggression
- Positive reinforcement works better and faster
Pro Tip: If your dog pulls heavily, start with a front-clip harness while you work on training. Once they’ve mastered loose-leash walking, you can switch to a back-clip or collar if you prefer.
Tool 4: High-Value Training Treats
What They Are: These aren’t regular dog biscuits. High-value treats are extra special rewards that make your dog’s eyes light up. Think of them as the difference between getting paid in pennies versus hundred-dollar bills.
Why You Need Them: Training is all about motivation. Your dog needs a reason to pay attention to you instead of that squirrel, that other dog, or that interesting smell. High-value treats make listening to you the best choice your dog can make.
What Makes a Good Training Treat:
- Small: Pea-sized or smaller (you’ll give lots during training)
- Soft: Quick to chew—no crunching that interrupts focus
- Smelly: Strong aroma catches and holds attention
- Easy to break: You can adjust size based on difficulty
Best Options:
- Freeze-dried liver or meat: Dogs go crazy for these
- String cheese: Cut into tiny pieces
- Hot dogs: Slice thin, then quarter the slices
- Cooked chicken: Plain, cut small
- Commercial training treats: Look for soft, meaty varieties
Treat Hierarchy: Not every situation needs the same reward level:
- Low distraction (home): Regular kibble or basic treats
- Medium distraction (quiet park): Good treats like commercial training treats
- High distraction (busy park): Break out the premium stuff—liver, cheese, chicken
Cost: $10-20 per month
How Much to Use: During active training, you might give 20-50 treats in a 10-minute session. This sounds like a lot, but remember:
- They’re tiny (pea-sized)
- Deduct treat calories from daily food
- Training sessions are short
- You’ll gradually reduce treats as skills improve
Pro Tip: Keep three different treat types in your pouch: low, medium, and high value. Match the treat to how hard you’re asking your dog to work. New skill in a distracting place? Time for the good stuff!
Tool 5: Treat Pouch
What It Is: A small bag that clips to your belt or waistband, designed to hold training treats and keep your hands free.
Why You Need It: Timing is everything in training. When your dog does something right, you have about 2 seconds to reward them—that’s the window where they connect “I did that, I got this.” Fumbling in your pockets ruins that timing.
A treat pouch means:
- Instant access to rewards
- Perfect timing every time
- Hands free to hold the leash
- No treat crumbs in your regular pockets
Features to Look For:
- Magnetic or drawstring closure: Easy one-handed access
- Clips to belt or has waist strap: Stays put while you move
- Multiple pockets: Treats, poop bags, keys, phone
- Washable material: It will get crumbs and drool
- Size appropriate: Big enough for a training session’s worth of treats
Cost: $15-25
DIY Alternative: Can’t afford a treat pouch right away? Use a fanny pack with ziplock bags inside. Not as fancy, but it works! Total cost: $5-10
Pro Tip: Keep your treat pouch stocked and hanging by the door with your leash. When it’s grab-and-go ready, you’re more likely to actually do training sessions. Convenience matters!
Starter Kit Total Cost: $70-165
Let’s add it up:
- Collar + ID tag: $10-30
- Standard leash: $15-40
- Harness or collar: $20-50
- Training treats: $10-20
- Treat pouch: $15-25
For less than $200 (and potentially under $100), you have everything you need to start training your dog. No expensive gadgets required. No fancy technology. Just the proven basics that actually work.
3. Important Add-Ons (Your Next Priority)
Once you’ve mastered the basics with your essential five, these tools take your training to the next level.
Tool 6: Long Line (15-30 Feet)
What It Is: An extra-long leash, usually made of lightweight nylon or biothane, that gives your dog freedom while keeping them safely connected to you.
Why You Need It: This is the secret weapon for recall training. How can you practice “come” in a big open space if your dog is either on a short leash or completely off-leash? A long line gives you the perfect middle ground—your dog feels free, but you can still catch them if they don’t listen.
When to Use It:
- Teaching recall in open spaces
- Practicing distance commands (“stay” from far away)
- Giving your dog more freedom before they’re reliable off-leash
- Sniff walks where your dog explores while you stay on the path
How to Choose:
- Length: Start with 15 feet, work up to 30 feet as skills improve
- Material: Biothane is waterproof and doesn’t absorb odors; nylon is cheaper but gets heavy when wet
- Width: Thinner for small dogs, thicker for large dogs
- No handle or small handle: Prevents getting caught on bushes
Cost: $15-30
Safety Tips: ⚠️ Never use a long line on sidewalks or in busy areas – Trip hazard! ⚠️ Wear gloves if your dog might bolt—rope burn is real ⚠️ Check for tangles around legs (yours and your dog’s) ⚠️ Don’t let it drag in sensitive environments (can harm wildlife)
Pro Tip: Practice in a big, empty field first. Let your dog wander while the line drags. Call them back, reward heavily when they come. Gradually increase distance and distractions.
Tool 7: Clicker (Optional but Helpful)
What It Is: A small handheld device that makes a distinct “click” sound when you press it.
Why It Helps: A clicker marks the exact moment your dog does something right. It’s more precise than saying “yes!” because:
- The sound is always identical
- It’s faster than speaking
- It’s emotionally neutral (no frustration in your voice)
- Dogs learn to love the click sound
How It Works:
- Dog sits
- Click! (marks the behavior)
- Treat immediately follows
- Dog learns: “That sound means I did it right, and food is coming!”
Who Benefits Most:
- Dogs learning complex tricks
- Owners working on precise timing
- Training situations where you need to mark behavior from a distance
- Shy or sensitive dogs who respond well to neutral markers
Cost: $5-10 for basic clicker, $15-20 for clickers with wrist straps
Alternative: Don’t want to carry a clicker? Use a verbal marker instead—a consistent word like “yes!” or “good!” that you say the instant your dog does something right. Free, always with you, works great.
Pro Tip: Before using a clicker in training, you need to “load” it. Click, then immediately treat. Repeat 10-20 times. Your dog learns that click = food is coming. Now the click itself becomes rewarding!
Tool 8: Crate (If You’re Crate Training)
What It Is: An enclosed space—like a den—where your dog can rest, sleep, and have safe alone time.
Why It Helps: Crates aren’t cages or punishment. When introduced properly, they’re your dog’s personal bedroom—a spot where they feel secure and can relax. Crates help with:
- House training (dogs don’t want to soil where they sleep)
- Safe management (preventing destructive behavior when you can’t supervise)
- Travel (safe way to transport dogs in cars)
- Anxiety relief (some dogs find comfort in enclosed spaces)
Types:
- Wire crates: Collapsible, good airflow, easy to clean
- Plastic crates: Airline-approved, more den-like feel
- Soft-sided crates: Portable, lightweight, only for dogs who won’t chew
- Heavy-duty crates: For escape artists or strong chewers
Sizing: Your dog should be able to:
- Stand up without hitting their head
- Turn around comfortably
- Lie down and stretch out
Too big? Your dog might potty in one corner and sleep in another (defeats house training purpose).
Cost: $30-150 depending on size and type
What Goes Inside:
- Comfortable bed or blanket
- Water bowl (clip-on style prevents spills)
- ONE safe toy (only after you know they won’t chew and swallow pieces)
- Cover three sides for den feeling
What to AVOID: ❌ Using the crate as punishment ❌ Leaving dog crated for too long (puppies: 1 hour per month of age; adults: 4-6 hours max) ❌ Forcing a scared dog inside ❌ Collars on in the crate (strangulation risk)
Pro Tip: Make the crate the best place on earth. Feed meals inside. Toss treats in randomly. Never force. Let your dog choose to go in. Within a week or two, most dogs start going to their crate on their own for naps.
Tool 9: Chew Toys (Size-Appropriate)
What They Are: Toys specifically designed for chewing—rubber, nylon, rope, or natural materials that satisfy your dog’s need to gnaw.
Why You Need Them: Dogs need to chew. It’s not bad behavior—it’s natural instinct. Puppies chew to soothe teething pain. Adult dogs chew to relieve stress, keep jaws strong, and clean their teeth. Give them appropriate things to chew, or they’ll choose your shoes, furniture, or phone chargers.
Best Types:
- Rubber toys (Kong): Nearly indestructible, can stuff with treats
- Nylon bones: Long-lasting for heavy chewers
- Rope toys: Good for tug and teeth cleaning
- Puzzle toys: Mental stimulation + chewing
How Many: Keep 5-8 toys and rotate 3-4 at a time. Toys that have been “away” feel new and exciting when they reappear.
Cost: $20-50 for a good starter set
Safety Rules: ⚠️ Size-appropriate: Should not fit entirely in mouth ⚠️ Supervise aggressive chewers: Especially with new toys ⚠️ Toss damaged toys: Exposed stuffing or broken pieces = choking hazard ⚠️ No rawhide for heavy chewers: Can break into large chunks and cause choking
Pro Tip: Stuff a Kong with treats and freeze it. This creates a long-lasting chew activity that’s perfect for keeping your dog busy during calm-down time or when you need to work. Peanut butter (xylitol-free!), mashed banana, or wet dog food work great.
Add-On Total Cost: $70-240
Essential five ($70-165) + Important add-ons ($70-240) = $140-405 total
For most dog owners, this is everything you’ll need for successful training from puppyhood through adulthood.
4. Training Goal-Specific Tools
Different training goals require different tools. Here’s what you need based on what you’re working on.
For Loose-Leash Walking:
The Problem: Your dog pulls like a sled dog on every walk. Your arm is sore. Walks are stressful, not fun.
Tools You Need:
- Front-clip harness – Redirects pulling energy to the side
- Standard 4-6 foot leash – Gives consistent communication
- Treat pouch – Reward every few steps of walking nicely
Training Timeline: 4-8 weeks of consistent daily practice
What to Avoid:
- Retractable leashes (teach pulling)
- Back-clip harnesses on pullers (gives more leverage)
- Long training sessions (5-10 minutes is plenty)
For Recall Training:
The Goal: Your dog comes running every time you call, no matter what’s happening around them.
Tools You Need:
- Long line (30 feet) – Safe practice in open spaces
- High-value treats – The BEST rewards only for recall
- Whistle (optional) – Consistent sound carries far
Location Progression:
- Inside home (boring, no distractions)
- Backyard (familiar, low distraction)
- Quiet park (more smells, some distance)
- Busier areas (other dogs, people, wildlife)
Training Timeline: 8-12 weeks to reliable recall
Pro Tip: Never call your dog for something they don’t like (bath, nail trimming, end of playtime). This ruins recall. Instead, go get them. Keep “come” always positive!
For House Training:
The Goal: Your dog only potties outside, asks to go out, no more accidents.
Tools You Need:
- Crate (properly sized)
- Enzymatic cleaner – Removes odor so dog doesn’t re-soil same spot
- Potty bells (optional) – Hang on door, teach dog to ring when they need out
- Consistent schedule – Not a tool, but critical!
Timeline: 4-16 weeks depending on:
- Age (puppies take longer)
- Consistency (more consistent = faster)
- Previous habits (rescue dogs may take longer)
The Formula:
- Take puppy out every 1-2 hours
- After waking, eating, drinking, playing
- Stand outside in one spot—don’t play yet
- The instant they potty: Party! Treat, praise, play
- If accident happens inside: Clean thoroughly, no punishment
- Repeat until they’re accident-free for 2 weeks
For Behavior Management:
The Goal: Prevent bad habits before they start. Stop unwanted behaviors through environmental control.
Tools You Need:
- Baby gates – Block off areas you don’t want dog accessing
- Exercise pen – Safe contained space for supervision breaks
- Training mat or “place” bed – Teach dog to go to spot and settle
- Puzzle toys – Mental stimulation reduces boredom-driven destruction
Use Cases:
- Gate off kitchen during meal prep (prevents begging)
- Exercise pen when guests visit (prevents jumping)
- Place bed when doorbell rings (prevents door bolting)
- Puzzle toys when you need to work (prevents attention-seeking)
The Principle: You can’t rehearse a bad habit if the environment prevents it. Management + training = faster results than training alone.
For Anxiety or Reactivity:
The Challenge: Your dog barks, lunges, or shuts down around triggers (other dogs, strangers, loud noises).
Tools You Need:
- Well-fitted harness (collar pressure increases anxiety)
- Leash with traffic handle – Quick close control
- High-value treats – Counter-conditioning requires premium rewards
- Calming aids – Mat, crate, calming music
Important: Tools help, but anxiety and reactivity often need professional support. A certified trainer or veterinary behaviorist can create a customized plan. Don’t try to fix complex behavior issues alone.
5. Advanced/Optional Tools (When You’re Ready)
For Advanced Training:
Once your dog has mastered basics, you might explore:
- Target stick – Teaching precise positioning and tricks
- Training vest – Multiple pockets for treats, toys, gear
- Agility equipment – Tunnels, jumps, weave poles for fun and fitness
- Scent work kits – Essential oils and containers for nosework games
Who Needs These: Dogs with solid obedience who are ready for advanced challenges and mental stimulation.
For Specific Situations:
Basket Muzzle:
- For safe introductions or vet visits
- Allows panting, drinking, treating
- Must be properly fitted and conditioned
Head Halter (Gentle Leader, Halti):
- For strong pullers when harness isn’t enough
- Requires gradual conditioning (many dogs resist at first)
- Gives control over head direction
GPS Tracker:
- For escape artists or off-leash adventurers
- Peace of mind in unfamiliar areas
- Some attach to collar, others are dedicated devices
Hands-Free Waist Leash:
- For jogging with your dog
- Keeps hands free, absorbs pull through core
- Great for multi-dog walking
Tech Tools:
Training Apps:
- Progress tracking
- Reminder schedules
- Video tutorials
- Community support
Smart Collars:
- Activity tracking
- GPS location
- Health monitoring
- Sleep patterns
Cost: $20-200+ depending on features
Worth It? If you’re data-driven and like tracking progress, yes. If you prefer simple and low-tech, skip it. Training doesn’t require technology—it requires consistency.
6. Size and Age Considerations
Toy Breeds (Under 10 lbs)
Special Needs:
- Extra-small harnesses (XXS sizing)
- Lightweight 4-foot leashes
- Treat pieces smaller than pea-sized
- Cat-sized toys often more appropriate
Safety Concern: Tracheal collapse risk—toy breeds should wear harnesses, not collars, during training and walks. Their delicate windpipes can’t handle pressure.
Small Dogs (10-25 lbs)
Equipment:
- Small harness or 1/2″ collar
- Standard 6-foot leash
- Small breed-specific gear
Challenge: “Small dog syndrome”—when small dogs develop big behavior problems because owners let them get away with things large dogs couldn’t. Train them with the same standards as big dogs!
Medium Dogs (25-60 lbs)
Equipment:
- Medium harness or 3/4″-1″ collar width
- Standard 6-foot leash
- Most standard tools fit perfectly
Advantage: This is the sweet spot—almost all equipment comes in medium sizes, and they’re strong enough to walk comfortably but not overwhelmingly powerful.
Large Dogs (60-100 lbs)
Equipment:
- Large/XL harness or 1″-1.5″ collar
- Reinforced 6-foot leash with padded handle
- Heavy-duty versions of everything
Challenge: Strength management—a 70-pound dog who pulls can drag most people. Front-clip harness is essential during training phase.
Giant Breeds (100+ lbs)
Equipment:
- XXL custom-fit harness or 1.5″-2″ collar
- Heavy-duty leash rated for large breeds
- Industrial-strength everything
Special Needs:
- Joint-friendly training (limit jumping/hard stops)
- Shorter training sessions (they tire faster)
- Start training EARLY (easier to train 20-pound puppy than 120-pound adult)
Puppy-Specific (Under 6 Months)
What’s Different:
- Adjustable collar/harness – They grow incredibly fast
- Lightweight 4-foot leash – Easier for them to handle
- Extra soft treats – Teething makes hard treats uncomfortable
- Puppy-safe chew toys – Size-appropriate, no choking hazards
Budget Tip: Don’t invest in expensive gear until your puppy is full-grown (around 12-18 months). Buy cheap adjustable collars that you can tighten as they grow.
Senior Dogs (7+ Years)
What’s Different:
- Padded harness – Provides joint support, less pressure
- Shorter sessions – They tire more easily
- Softer surfaces – Protect aging joints
- Ramps – Help getting in cars or on furniture
Focus: Comfort over performance. Training is still possible (old dogs CAN learn!), but be gentlematically patient.
7. Common Mistakes (And How to Avoid Them)
Mistake 1: “I’ll Buy Everything at Once”
The Problem: You spend $500 at the pet store, bring home bags full of gear, and feel overwhelmed. Half of it sits unused.
The Solution:
- Week 1: Buy only the essential 5
- Week 2-4: Add tools based on what you’re actually working on
- Month 2+: Invest in advanced gear only when needed
Save Money: Borrow specialized equipment before buying. Does your dog actually like agility, or was it a one-time interest?
Mistake 2: “Close Enough” on Sizing
The Problem: Harness rides up into armpits. Collar slips off. Leash is too heavy for your small dog to walk comfortably.
The Solution:
- Measure your dog – Neck, chest, weight
- Check sizing charts – Every brand differs
- Try it on if possible – Pet stores often allow this
Red Flags:
- Collar slides over head when pulled
- Harness shifts or rubs during walking
- Dog constantly tries to remove gear
Fix It: Improperly fitted equipment doesn’t work and can cause injury. Get the right size.
Mistake 3: “This Shock Collar Will Fix It Fast”
The Problem: You’re desperate for quick results, and someone told you punishment-based tools work faster.
The Reality:
- They might suppress behavior temporarily
- But they damage trust and create fear
- Often lead to increased anxiety and aggression
- Positive reinforcement works just as fast AND builds your bond
Tools to NEVER Use: ❌ Shock/e-collars ❌ Prong/pinch collars ❌ Choke chains ❌ Spray collars
Better Solution: High-value rewards, consistency, and patience. You’re teaching a language, not forcing obedience.
Mistake 4: “My Dog Hates the Harness”
The Problem: You bought a harness, wrestled it onto your dog once, and now they run when they see it.
What Went Wrong: You didn’t introduce it gradually. Imagine someone putting a tight jacket on you without warning—you’d resist too!
How to Fix It:
- Day 1-2: Leave harness on floor with treats on it
- Day 3-4: Hold harness, give treats near it
- Day 5-6: Slip harness on (don’t clip), give treats, remove immediately
- Day 7: Clip harness, give treats, remove after 30 seconds
- Day 8+: Gradually increase wearing time with positive associations
The Principle: Pair gear with good things. Your dog should think, “Harness = treats and walks!” not “Harness = trapped and uncomfortable!”
Mistake 5: “I Bought It, So It Should Work”
The Problem: You have the gear but haven’t learned how to use it properly.
The Reality: A clicker doesn’t train your dog—YOU train your dog using the clicker as a tool. Same with every piece of equipment.
The Solution:
- Watch tutorials on proper usage
- Consider a single session with a trainer
- Read instructions thoroughly
- Practice without your dog first (clicker timing, treat delivery, etc.)
Remember: Tools amplify your training, but they don’t replace it.
Mistake 6: “Retractable Leashes Are Convenient”
Why It Seems Good: Your dog gets 16 feet of freedom!
The Reality:
- Teaches pulling – Dog learns pulling = more leash
- Dangerous – Thin cord can cause serious injuries
- Less control – Can’t shorten quickly in emergencies
- Bulky handle – Awkward for training exercises
When They’re Okay: AFTER your dog has mastered loose-leash walking, in wide-open safe spaces.
For Training: Stick with standard leashes.
Mistake 7: “It Still Works, So I’ll Keep Using It”
The Problem: Your leash is frayed, harness clip is cracked, collar is stretched out—but you keep using it.
The Safety Risk: Equipment fails at the worst possible moment—when your dog sees a squirrel, another dog approaches, or you’re near traffic.
Inspection Schedule:
- Monthly: Check all gear for wear
- Before hikes/adventures: Extra inspection
- After incidents: If your dog pulled hard, check for damage
Replace Immediately:
- Frayed leashes or collars
- Broken harness clips or buckles
- Stretched-out elastic
- Cracked plastic parts
Your dog’s safety is worth the cost of replacement gear.
Mistake 8: “Sometimes Front-Clip, Sometimes Back-Clip”
The Problem: Monday you use the front clip. Wednesday the back clip. Friday you forget the harness and use just a collar. Your dog is confused about what you want.
Why Consistency Matters: Your dog learns through patterns. If the rules keep changing, they can’t figure out the right behavior.
The Solution: Choose your tools and methods. Stick with them for at least 4-6 weeks before evaluating if you need to change. Consistency beats variety every time.
8. Caring for and Organizing Your Tools
Storage Solutions
By the Door:
- Hooks for leash and harness (grab-and-go ready)
- Basket or bin for poop bags, extra collar
- Treat pouch hanging where you’ll remember it
Near the Crate:
- Bin for toys (easy rotation system)
- Separate crate bedding storage
- Cleaning supplies for accidents
In the Car:
- Duplicate leash and collar
- Travel water bowl
- Extra treats
- First aid kit
Why It Matters: When training tools are convenient to access, you’re more likely to actually use them. Make it easy on yourself!
Cleaning and Maintenance
Leashes, Collars, Harnesses:
- Wash every 2-4 weeks (more if muddy/smelly)
- Hand wash or machine wash in mesh bag
- Air dry (heat can damage materials)
- Check for wear after washing
Toys:
- Rubber/hard toys: Dishwasher top rack or hot soapy water weekly
- Rope toys: Soak in vinegar solution, rinse thoroughly
- Plush toys: Machine wash in hot water, air dry
- Replace: When stuffing shows, pieces break off, or excessive wear
Treat Pouches:
- Empty crumbs after every walk
- Wash weekly
- Replace when zippers break or material tears
Crate:
- Wipe down weekly with pet-safe cleaner
- Wash bedding weekly
- Deep clean monthly
When to Replace
Immediately: ⚠️ Frayed leashes – Can snap under tension ⚠️ Broken clips or buckles – Safety failure risk ⚠️ Damaged harness stitching – Can come apart during use ⚠️ Cracked chew toys – Choking hazard
Soon:
- Worn treat pouch closures
- Faded ID tags (hard to read)
- Stretched-out collars
- Toys with minor damage
Eventually:
- Gear you’ve outgrown (puppy harnesses)
- Tools you never use
- Duplicate items when one is enough
Toy Rotation Strategy
Why Rotate: Toys that are always available become boring. Toys that “go away” stay interesting.
The System:
- Keep 5-8 total toys
- Put out 3-4 at a time
- Every 3-4 days, swap out for different toys
- Clean toys while they’re in rotation-out mode
Bonus: This makes fewer toys feel like more, saving you money!
9. Budget-Friendly Alternatives
DIY Options That Actually Work
Instead of $20-25 Treat Pouch: ✅ Use: Fanny pack ($8) + ziplock bags ✅ Or: Carpenter’s apron with pockets ($12) ✅ Savings: $8-17
Instead of $5-10 Clicker: ✅ Use: Ballpoint pen click sound ✅ Or: Tongue click (free!) ✅ Or: Verbal marker “YES!” ✅ Savings: $5-10
Instead of $30-50 Training Mat: ✅ Use: Bath mat or towel from home ✅ Or: Old yoga mat ✅ Savings: $20-40
Instead of Buying New Toys Constantly: ✅ Rotate existing toys (feels new!) ✅ DIY snuffle mat from fleece strips ✅ Frozen carrots as chew treats ✅ Cardboard boxes for shredding (supervised) ✅ Savings: $30-50 annually
Where NOT to Cheap Out
Some things are worth the investment:
Harness/Collar:
- Safety-critical equipment
- Quality materials prevent breakage
- Don’t cheap out: Invest in good fit and durability
Leash:
- Your main safety line
- Fraying can cause dangerous failures
- Don’t cheap out: Buy quality, replace when worn
High-Value Treats:
- Motivation makes or breaks training
- Cheap treats often don’t motivate effectively
- Don’t cheap out: Find what YOUR dog goes crazy for
Everything Else: Look for deals, try DIY, borrow before buying!
10. When to Seek Professional Help
Tools Can’t Fix Everything
You’ve got all the right equipment. You’re consistent. You’re patient. But your dog still isn’t improving. This is when you need professional help.
Signs You Need a Trainer: ✅ No progress after 6-8 weeks of consistent effort ✅ Behavior is getting worse, not better ✅ Your dog shows fear or aggression ✅ You feel overwhelmed and don’t know where to start ✅ Behavior problems affect quality of life (can’t have guests, can’t walk dog) ✅ Complex issues (separation anxiety, reactivity, resource guarding)
What Trainers Provide:
- Customized training plans for your specific dog
- Demonstration of proper tool usage
- Real-time troubleshooting
- Accountability and support
- Professional assessment of behavior
How to Find Quality Help
Look for Certifications:
- CPDT-KA (Certified Professional Dog Trainer – Knowledge Assessed)
- KPA CTP (Karen Pryor Academy Certified Training Partner)
- IAABC (International Association of Animal Behavior Consultants)
- CCPDT (Certification Council for Professional Dog Trainers)
Ask These Questions:
- “What training methods do you use?” (Answer should be: positive reinforcement)
- “Do you use punishment or aversive tools?” (Answer should be: No)
- “Can I observe a class first?”
- “What’s your experience with my breed/my dog’s specific issue?”
- “What happens if we don’t see progress?”
Red Flags to Avoid: ❌ Uses dominance/alpha language ❌ Talks about “showing the dog who’s boss” ❌ Uses or recommends shock, prong, or choke collars ❌ Guarantees results in unrealistic timeframes ❌ Won’t answer questions or let you observe ❌ Makes you feel judged or inadequate
Remember: A good trainer educates YOU to train your dog. They don’t just fix the dog and hand them back.
Conclusion: Your Shopping List and Action Plan
Let’s bring it all together. You don’t need a garage full of equipment—you need the right tools used consistently.
Week 1: Essential Starter Kit ($70-165)
Buy these first:
- ✅ Collar with ID tag ($10-30)
- ✅ Standard 6-foot leash ($15-40)
- ✅ Harness or training collar ($20-50)
- ✅ High-value training treats ($10-20)
- ✅ Treat pouch ($15-25)
Total: $70-165
Your First Week Goal: Get your dog comfortable wearing gear. Practice short 5-minute training sessions. Build the habit of daily training.
Weeks 2-4: Add Based on Goals ($70-240)
Add these as your training progresses: 6. ✅ Long line for recall training ($15-30) 7. ✅ Clicker if helpful ($5-10) 8. ✅ Crate if needed ($30-150) 9. ✅ Appropriate chew toys ($20-50)
Total Additional: $70-240
Your Month Goal: Practice one main skill (loose-leash walking OR recall OR house training). Add tools that support that specific goal.
Month 2+: As Skills Advance
Only add these when:
- ✅ Basic obedience is solid
- ✅ You’ve mastered using essential tools
- ✅ Your dog is ready for advanced challenges
Options:
- Goal-specific training tools
- Advanced equipment (agility, scent work)
- Tech aids (apps, smart collars)
The Real Secret to Success
Here’s what I’ve learned after years of training dogs: Tools are just tools.
Success doesn’t come from having the fanciest harness, the most expensive treats, or every gadget on the market. Success comes from:
✅ Consistency – Train daily, even if just 5 minutes ✅ Patience – Most skills take 8-12 weeks to solidify ✅ Proper usage – Learn how each tool works ✅ Your bond – Tools help you communicate, but relationship matters most
The best training tool you have is you—your time, your attention, your consistency, and your patience.
Your Action Step Today
Don’t try to do everything at once. Here’s what to do right now:
Step 1: Choose ONE skill to work on this month
- Loose-leash walking?
- Recall?
- House training?
- Basic obedience (sit, stay, come)?
Step 2: Get the essential tools for that specific skill
Step 3: Practice 5-10 minutes daily
Step 4: Track progress weekly
Step 5: Add more tools only as skills advance
Your dog doesn’t need everything in the pet store. They need the right tools, used consistently, with patience and love.
Start simple. Stay consistent. Watch your training transform.
You’ve got this! 🐾


